Smashed Chickpea Sandwich Recipe
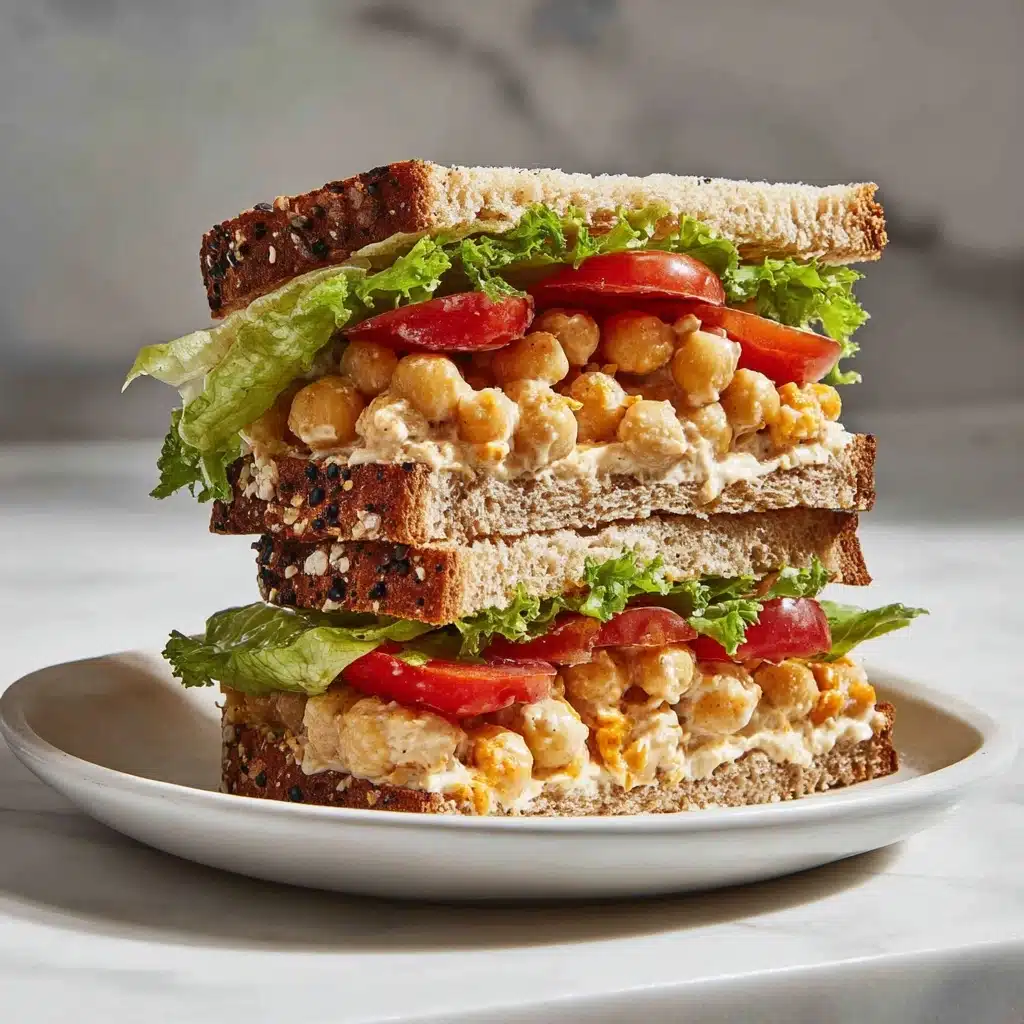
If you’re craving a crave-worthy lunch that satisfies your hunger and your taste buds, look no further than the Smashed Chickpea Sandwich. This hearty, deli-style creation is a plant-based twist on a classic, featuring mashed chickpeas swirled with crunchy veggies and zesty Dijon, all piled high between slices of your favorite bread. Whether you’re planning lunches for the week or looking for a quick, protein-packed meal to whip up in minutes, this sandwich delivers tangy, creamy, and crisp flavors in every bite. Trust me, after one taste, you’ll understand why this staple has earned its place in my regular lunch rotation!
Ingredients You’ll Need
Every ingredient in a Smashed Chickpea Sandwich serves a special purpose, from bringing a pop of color and crunch to delivering that craveable creaminess. Gather these simple items and you’re halfway to your new favorite sandwich!
- Chickpeas: The heart of the sandwich—a can of these little legumes adds plant-based protein and the perfect texture for smashing.
- Vegan mayo or Greek yogurt: Adds creaminess and binds everything together; choose based on whether you want to go fully vegan or keep things extra tangy with yogurt.
- Dijon mustard: Just a teaspoon gives the filling a subtle zing and depth of flavor.
- Celery: Finely chopped for a fresh, juicy crunch in every bite—don’t skip this one!
- Red onion: Adds a bold, savory note and pretty purple flecks that make the sandwich even more appetizing.
- Salt and pepper: Essential for rounding out and lifting the flavors; add to taste.
- Whole grain bread: A sturdy, fiber-rich base that holds up to the hearty filling—plus, it toasts beautifully.
- Optional toppings: Lettuce, tomato slices, and pickles add freshness and extra crunch, giving you endless ways to make it your own.
How to Make Smashed Chickpea Sandwich
Step 1: Mash the Chickpeas
Drain and rinse your chickpeas, then toss them into a medium mixing bowl. Use a fork or potato masher to break them down until they’re chunky but still have a bit of texture. You’re looking for a spreadable mix—think rustic, not totally smooth.
Step 2: Mix in the Good Stuff
Add the vegan mayo (or Greek yogurt), Dijon mustard, finely chopped celery, and red onion straight into your bowl of smashed chickpeas. Give it a good stir and season generously with salt and pepper. Make sure the veggies are evenly distributed for maximum crunch and color in every bite.
Step 3: Toast the Bread (Optional but Recommended!)
Pop your whole grain bread into the toaster or on a dry skillet until golden and crisp. Toasting isn’t required, but it makes the Smashed Chickpea Sandwich extra satisfying, adding both flavor and structure.
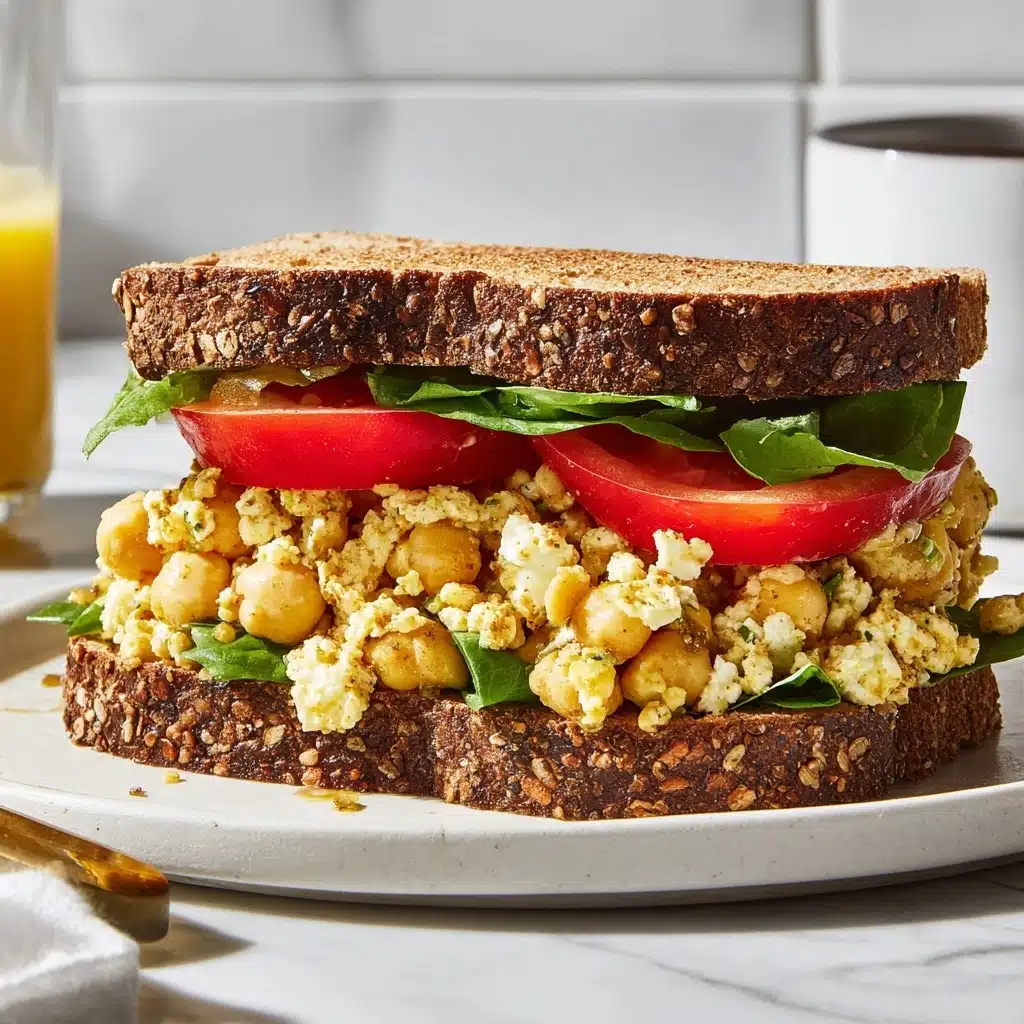
Step 4: Assemble Your Sandwich
Spread a generous layer of the chickpea filling onto a slice of bread, then top with lettuce, tomato slices, or pickles if you like. Crown it with a second slice of bread, gently press together, and cut in half for that classic deli sandwich look.
How to Serve Smashed Chickpea Sandwich
Garnishes
Sprinkle a little extra chopped fresh parsley or a dash of cracked black pepper over the filling before adding the top slice of bread. For a flavor kick, try a light drizzle of sriracha or a squeeze of lemon juice to brighten everything up.
Side Dishes
Pair your Smashed Chickpea Sandwich with kettle chips, crunchy veggie sticks, or a crisp apple for the ultimate lunch combo. If you have a little extra time, a simple green salad tossed in lemony vinaigrette makes an awesome, refreshing side.
Creative Ways to Present
Transform your sandwich into open-faced tartines topped with microgreens, or stuff the filling into pita pockets for a portable lunch. Don’t sleep on using the smashed chickpea mix as a dip with crackers or scooped into lettuce cups for a light, gluten-free twist.
Make Ahead and Storage
Storing Leftovers
The chickpea filling keeps beautifully! Store any leftovers in an airtight container in the fridge; it stays fresh and flavorful for up to 3 days. When you’re ready to eat, just give it a quick stir and assemble a sandwich in seconds.
Freezing
While you technically can freeze the chickpea mixture, the veggies may lose some of their crunch once thawed. If you do freeze it, let it defrost overnight in the fridge, stir well, and refresh with extra celery or onion as needed before spreading onto bread.
Reheating
No reheating needed—Smashed Chickpea Sandwich is designed to be enjoyed cold or at room temperature, which makes it perfect for grab-and-go meals or work lunches. If you’ve toasted your bread in advance, a quick refresh in the toaster brings back that lovely crunch.
FAQs
Can I use dried chickpeas instead of canned?
Absolutely! Just soak and cook your dried chickpeas until tender, then measure out about 1.5 cups for this recipe. Canned makes things extra speedy, but DIY gives you more control and often even better flavor.
How long does the filling stay fresh in the fridge?
The chickpea filling can be kept in the fridge for up to 3 days. For best results, store it separately from the bread and toppings to keep everything crisp and tasty.
What are the best bread options for a Smashed Chickpea Sandwich?
Whole grain bread is my favorite for both nutrition and texture, but sourdough, ciabatta, or any sturdy sandwich loaf work wonderfully. Gluten-free bread is also a great option—just be sure to toast it for stability!
Can I add other veggies or herbs?
Definitely! Try chopped bell peppers, shredded carrot, fresh dill, or parsley for extra flavor and color. This recipe is super adaptable—use whatever you have on hand or what you’re craving most.
Is this sandwich high in protein?
Yes! Chickpeas are a plant-based protein powerhouse, making the Smashed Chickpea Sandwich a satisfying and energizing meal—perfect for lunch, post-workout, or whenever you need a boost.
Final Thoughts
If you’re searching for a quick, delicious, and wholesome lunch, the Smashed Chickpea Sandwich is sure to become a new favorite in your lineup. Give it a try next time you need something nourishing, simple, and totally satisfying—you’ll be hooked after the very first bite!