Heavenly Oreo Dessert Recipe
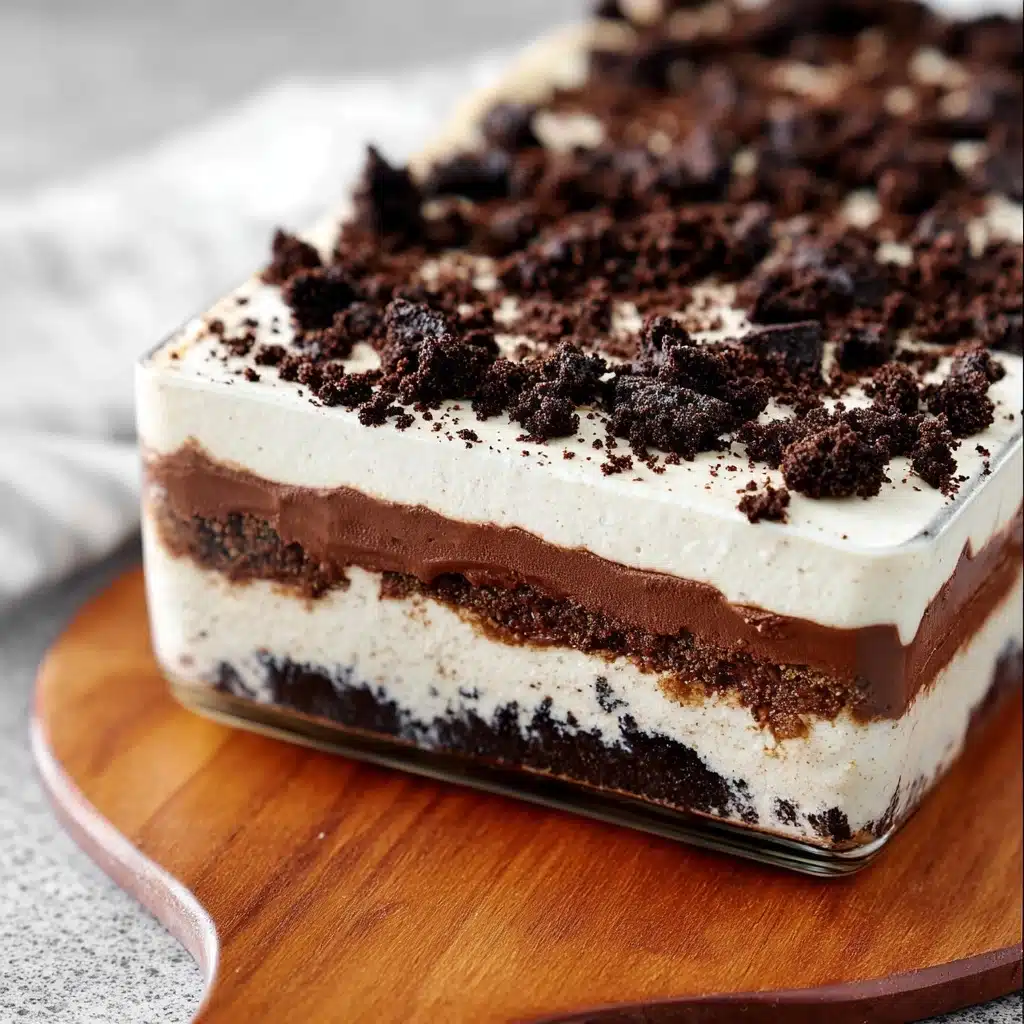
Heavenly Oreo Dessert is every bit as dreamy as the name promises. Imagine a symphony of crushed Oreos, layers of rich chocolate pudding, and clouds of velvety cream cheese filling—all topped with a pillowy blanket of Cool Whip. This chilled, no-bake treat takes simple grocery store staples and turns them into an utterly crave-worthy masterpiece. If you love desserts that are equal parts indulgent and nostalgic, this is the one to make for your next gathering… or just because you deserve a little slice of bliss.
Ingredients You’ll Need
With just a handful of pantry-friendly ingredients, this Heavenly Oreo Dessert packs loads of flavor and irresistible texture. Each component is carefully chosen to maximize decadence, creaminess, and that all-important Oreo cookie crunch.
- Double-Stuffed Oreo cookies (1 package, 15.35 ounces): More filling means extra creamy, chocolatey bites and the perfect cookie-to-creme ratio.
- Butter, melted (1/2 cup): Holds the Oreo crust together and adds richness that melts in your mouth.
- Instant chocolate pudding mix (2 boxes, 3.9 ounces each): The ultimate shortcut to a luscious, chocolatey layer.
- Cold milk (3 ¼ cups): Brings the pudding mix to creamy, dreamy life—be sure it’s nice and cold so the pudding sets up perfectly.
- Cool Whip, thawed (2 containers, 8 ounces each): Adds pillowy lightness to both the filling and the final layer.
- Cream cheese, softened (1 block, 8 ounces): For an ultra-smooth, tangy layer that perfectly balances the sweetness.
- Powdered sugar (1 cup): Sweetens the cream cheese filling without adding any grittiness.
How to Make Heavenly Oreo Dessert
Step 1: Crush the Oreos
Start by placing all the Oreo cookies into a large zip-lock bag, then zip it shut. Lay the bag on your countertop and use a rolling pin to crush the cookies into chunks. Don’t go for a fine powder—you want some texture, so aim for small pieces and crumbs. This creates those coveted bites with Oreo crunch!
Step 2: Prepare the Oreo Crust
Scoop out about a third of the crushed cookie mixture and set it aside for the topping (the best part!). Pour the remaining Oreos into a 9×13 baking pan, drizzle over the melted butter, and thoroughly mix until everything is evenly moistened. Use your hands or a spatula to press this mixture firmly into the pan, making sure to form a solid, even base.
Step 3: Make the Chocolate Pudding
In a mixing bowl, whisk together both boxes of instant chocolate pudding mix with the cold milk. Take your time whisking so there are no lumps. Cover the bowl and place it in the fridge for a few minutes to help the pudding set up while you prepare the rest of the layers.
Step 4: Whip Up the Cream Cheese Layer
In a medium bowl, blend the softened cream cheese until smooth and creamy—no lumps allowed! Gradually add in the powdered sugar, blending until completely combined. Finally, gently fold in one container of Cool Whip to create a seriously fluffy, sweet, and tangy filling. Carefully spread this mixture over your Oreo crust.
Step 5: Build and Chill Your Heavenly Oreo Dessert
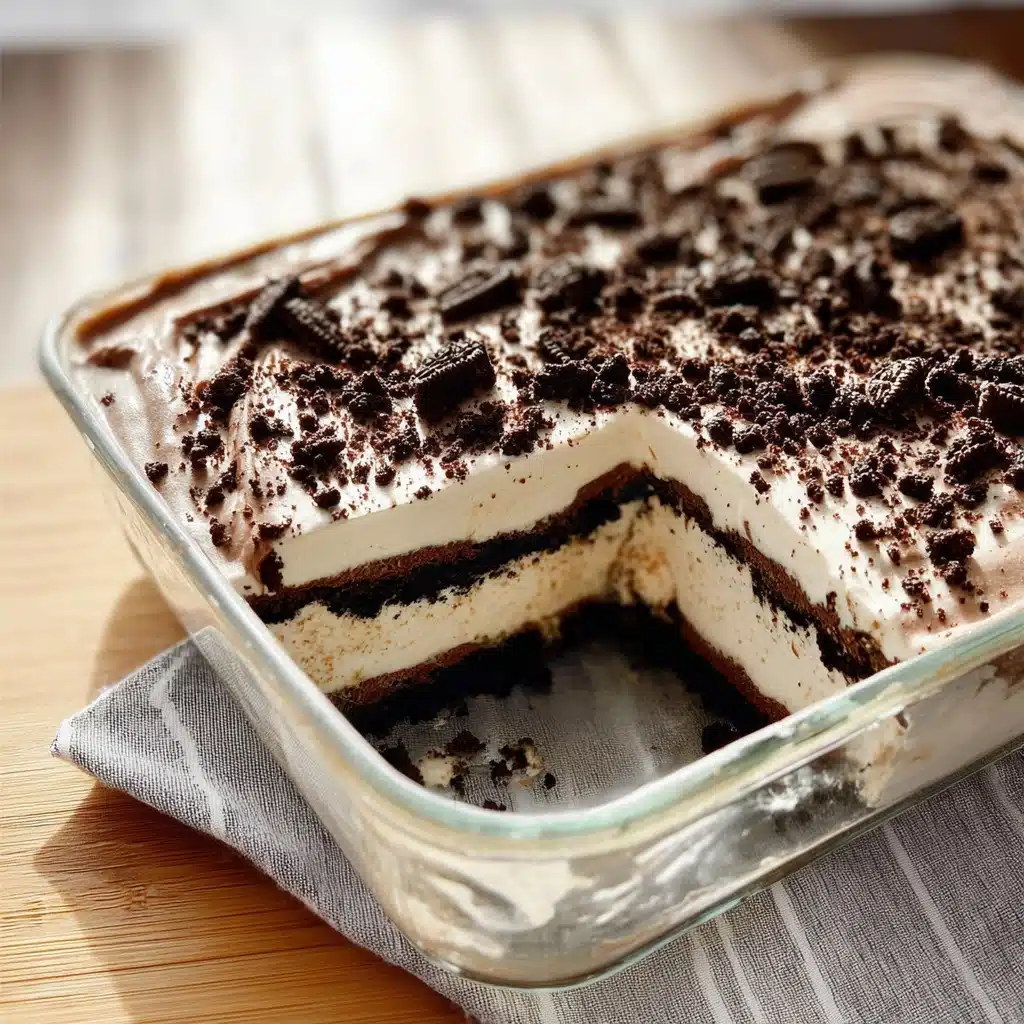
Once your cream cheese layer is smoothed out, take the set chocolate pudding from the fridge and evenly spread it over the cream cheese mixture. Top that with the other container of Cool Whip, spreading it all the way to the edges. Finish strong by sprinkling the reserved Oreo crumbs over everything for that signature look and flavor. Cover and chill in the refrigerator for at least two hours—overnight is even better. This step ensures the layers set perfectly and all the flavors meld together.
How to Serve Heavenly Oreo Dessert
Garnishes
The signature garnish for Heavenly Oreo Dessert is that generous blanket of crushed Oreo crumbles on top, but you can take it further: drizzle a little chocolate syrup, add a few mini chocolate chips, or even garnish with whipped cream swirls and extra Oreo halves for a bakery-worthy finish. Don’t be afraid to have a little fun—this dessert loves a touch of drama!
Side Dishes
Serve Heavenly Oreo Dessert alongside a cup of strong coffee or a cold glass of milk to temper the sweetness. For special occasions, pair it with fresh raspberries or strawberries for a pop of color and fruity brightness that complements all those rich, chocolatey layers.
Creative Ways to Present
You can assemble Heavenly Oreo Dessert in individual mason jars or parfait glasses for a stunning single-serve treat, perfect for dinner parties or picnics. Or, try cutting the finished dessert into cute little squares and inserting popsicle sticks for a fun, portable twist. For a birthday, add colorful sprinkles or chocolate shavings to the top layer before chilling. The possibilities are deliciously endless!
Make Ahead and Storage
Storing Leftovers
If you’re lucky enough to have any Heavenly Oreo Dessert left, just cover the pan tightly with plastic wrap or a lid, and store it in the refrigerator. It will stay fresh and delicious for up to four days. Chill time actually improves the melding of flavors, so don’t hesitate to sneak a square the next day—if you can resist!
Freezing
You can freeze Heavenly Oreo Dessert to enjoy later. Simply wrap individual portions or the entire pan with plastic wrap and then aluminum foil. Freeze for up to two months. When you’re ready to eat, let it thaw in the refrigerator overnight; the texture remains surprisingly creamy and delicious.
Reheating
No reheating required—this dessert is meant to be served chilled! If it’s a bit too firm straight from the fridge or freezer, just let it sit at room temperature for 10–15 minutes to soften up. That’s all it takes for perfectly scoopable, creamy bites.
FAQs
Can I use regular Oreos instead of double-stuffed?
Absolutely! Regular Oreos work just fine in Heavenly Oreo Dessert, though double-stuffed give that extra creamy factor. If using regular, consider adding a bit more butter to the crust for moisture. The overall flavor and texture will still wow your crowd.
Is it possible to use homemade whipped cream instead of Cool Whip?
Yes, homemade whipped cream is a fantastic swap if you prefer a lighter, less processed topping. Use the same amount as the Cool Whip in the recipe. Just be sure it’s whipped to stiff peaks so it holds up in the layers.
Can I prepare Heavenly Oreo Dessert the day before serving?
Absolutely—this dessert actually gets better with time! Assembling it the day before ensures the layers meld together, making each bite even more decadent. Just keep it chilled until you’re ready to serve.
What’s the best way to crush the Oreos if I don’t have a rolling pin?
A food processor works wonders for quickly crushing Oreos. If you don’t have one, a sturdy glass, the bottom of a heavy mug, or even your hands will do the trick. Just make sure the cookies end up in small, chunky pieces for the best texture.
Can I add peanut butter or other flavor twists to Heavenly Oreo Dessert?
Definitely! Swirl in a layer of peanut butter, Nutella, or even caramel between the pudding and cream cheese for a creative twist. You could also experiment with flavored Oreos or mix mini chocolate chips into the crust for extra fun.
Final Thoughts
If you’re looking for a swoon-worthy treat that’s sure to bring smiles, Heavenly Oreo Dessert is the answer. It’s easy, show-stopping, and never fails to disappear at any gathering. Give it a try and watch every last bite vanish—just don’t be surprised when you’re asked for the recipe again and again!
PrintHeavenly Oreo Dessert Recipe
Indulge in layers of chocolate pudding, cream cheese filling, and fluffy Cool Whip in this heavenly Oreo dessert. Every bite is pure bliss!
- Prep Time: 20 minutes
- Total Time: 2 hours 50 minutes
- Yield: 12 servings 1x
- Category: Dessert
- Method: Mixing, Chilling
- Cuisine: American
- Diet: Vegetarian
Ingredients
Oreo Cookie Crust:
- 1 package (15.35 ounces) Double-Stuffed Oreo cookies
- 1/2 cup butter, melted
Cream Cheese Filling:
- 2 boxes (3.9 ounces each) instant chocolate pudding mix
- 3 1/4 cups cold milk
- 2 containers (8 ounces each) Cool Whip, thawed
- 1 block (8 ounces) cream cheese, softened
- 1 cup powdered sugar
Instructions
- Oreo Cookie Crust: Take a large zip-lock bag and crush Oreo cookies into small chunks. Reserve 1/3 for topping. Mix the remaining crumbs with melted butter and press into a 9×13 pan.
- Cream Cheese Filling: Whisk pudding mixes with milk and chill. Blend cream cheese until smooth, add powdered sugar, and fold in one container of Cool Whip. Spread this mixture over the cookie crust.
- Assemble: Spread chocolate pudding over the cream cheese layer, top with the remaining Cool Whip, and sprinkle with reserved cookie crumbs. Chill for at least 2 hours before serving.
Notes
- You can also garnish with additional Oreo crumbs or chocolate shavings for extra flair.
- This dessert can be made a day in advance and refrigerated overnight for even better flavor.
Nutrition
- Serving Size: 1 serving
- Calories: 380 kcal
- Sugar: 28g
- Sodium: 380mg
- Fat: 20g
- Saturated Fat: 12g
- Unsaturated Fat: 6g
- Trans Fat: 0g
- Carbohydrates: 45g
- Fiber: 1g
- Protein: 5g
- Cholesterol: 40mg
Keywords: Heavenly Oreo Dessert, Oreo pudding dessert, chocolate Oreo dessert